Organizing your sugar glider habitat the right way is not a complicated task. However, there are a few things you should definitely get right to make sure your gliders thrive in their home. In this post, we will see what makes a good sugar glider cage setup.
To set up your sugar glider cage properly, pay attention to the following:
- The type of cage you choose for your sugar glider
- Where you place the cage in the house
- The necessary items you should put inside the cage, such as appropriate bedding, a nest pouch, and an assortment of toys.
STEP 1 – Choose the right type of cage for your sugar gliders
The first step in setting up a sugar glider cage is to purchase or build a cage. Many glider owners tend to use cages specifically made for sugar gliders, while others use metal wire cages that resemble tall bird cages.
As with a birdcage, the sugar glider cage includes a tray at the bottom for cleaning out the bedding and multiple perches for the glider to climb on.
The more sugar gliders, the bigger the cage
Of course, the size of the cage depends on the number of gliders living inside. Sugar gliders live in colonies in the wild and enjoy socialization. So when choosing a cage for one or two sugar gliders, select a cage that measures at least 24 x 24 x 36 inches. If you plan to own more than two gliders, choose a larger cage.
Also, the gliders need plenty of space for jumping, climbing, and remaining active. These are nocturnal animals that tend to sleep through most of the day and stay busy at night, which is when they are typically kept inside their cages. The cage you use should not provide an opening for escape. Make sure that the space between the wires is no more than half an inch. If the sugar glider can get its head through the wire bars, it can find a way to escape.
Equally important, the cage door needs to provide enough space to fit a nest box through unless you plan to use a nest pouch. It should also have a secure latch that the gliders cannot open on their own. Some clever sugar gliders eventually figure out how to open simple latches and let themselves out.
STEP 2 – Choose a Suitable Spot in Your House for the Cage
Before setting up your cage, choose the right spot for it. Keep it somewhere with a temperature of at least 65 degrees Fahrenheit. Colder temperatures increase the risk of illness and lethargy. You may also want to learn some of the common signs of a sick sugar glider if the temperatures occasionally drop too low.
As a matter of fact, the preferred temperature range for sugar gliders falls between 75 degrees and 80 degrees Fahrenheit. The normal room temperature should work well. Just make sure that the temperatures don’t get too low at night.
To maintain a slightly warmer temperature compared to the room, some owners choose to add fleece blankets in or around the cage. Moreover, placing a small space heater near the cage also provides a safe way to increase the temperature inside the cage, but it needs to remain out of reach of the sugar glider.
You don’t need a lamp or heat rock for the glider cage, as these pieces of equipment bring a risk of electrocution, shock, or burning. Additionally, you should place the cage away from windows where it may get direct sunlight. In the Western hemisphere, south-facing and west-facing windows tend to get the most sunlight.
STEP 3 – Gather the necessary items
After purchasing a cage, you still need to gather the items that you plan to place inside it. Ideally, sugar gliders need several items to make their homes complete:
- Bedding
- Water bottle and dish
- Food dish
- Nest box or pouch
- Toys
Bedding, toys, and nest boxes or pouches are essential items that we’ll cover below, but you also need something to hold food and water.
However, when you first bring a sugar glider home, it may not know how to drink from a water bottle, so make sure that you also provide a water dish. For food dishes and water dishes, you can use bird dishes, as they feature clips for securing to the side of wire cages.
When positioning the food dishes, choose a spot toward the top of the cage. Sugar gliders tend to feel more comfortable when eating from a height.
STEP 4 – Pick the right bedding for your sugar gliders
Sugar glider owners have different preferences for bedding material. While gliders don’t like to go to the bathroom where they sleep and eat, they will relieve themselves in a corner or away from the nesting pouch, food, and water. Common choices for bedding include:
- Shredded newspaper
- Wood shavings
- Commercial sugar glider liners
- Commercial sugar glider substrate
Further, if you choose something not made specifically for sugar gliders, ensure that it is non-toxic. Don’t rip up magazine pages, as the ink may be toxic. Regular newspaper, without the inserts, works well. And no matter what type of bedding you choose, clean them out at least once per week or as needed. If you have multiple sugar gliders, you will likely need to clean them more frequently.
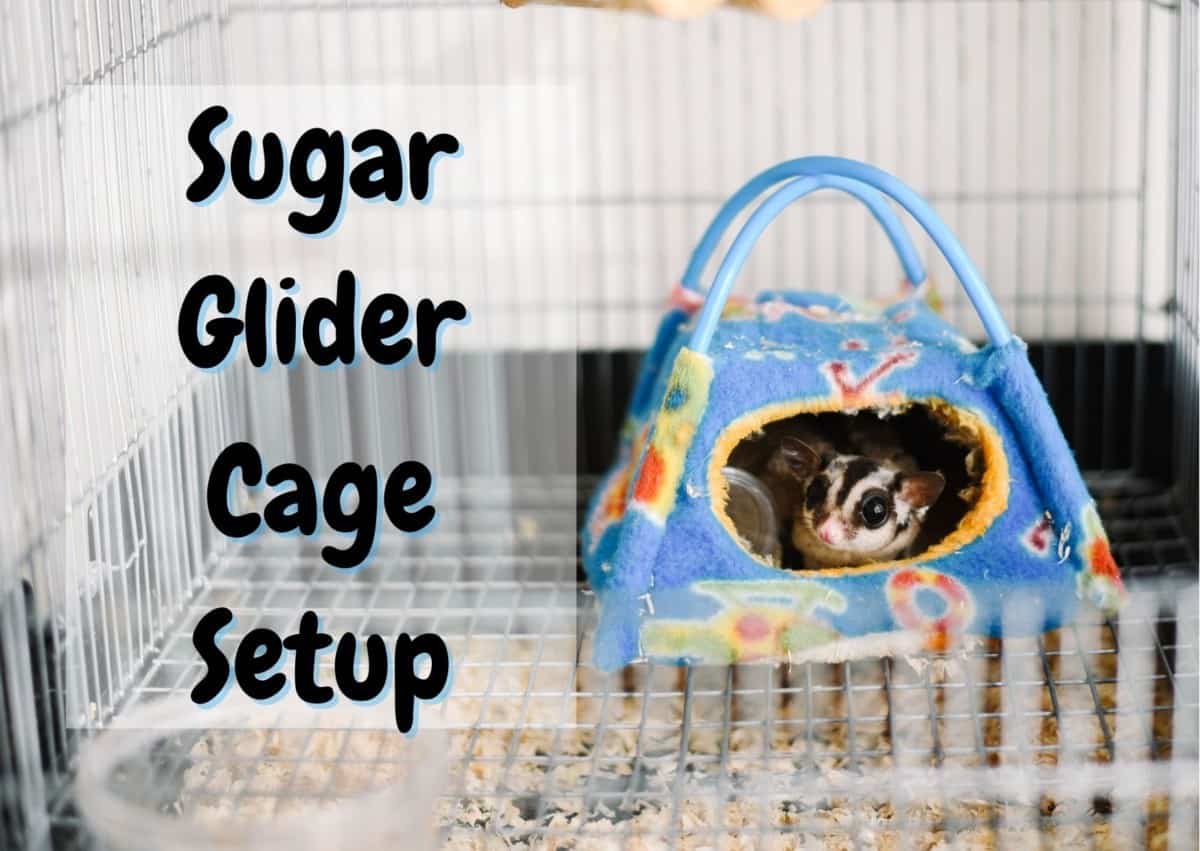
STEP 5 – Invest in good nest pouches
A nest pouch is a spot for your sugar glider to sleep during the day. The cloth or fleece pouches resemble the bonding pouches that people often carry their sugar gliders around in.
When gathering items for your sugar glider cage, you may find nest pouches and nest boxes. Some people prefer pouches, while others prefer boxes. Actually, nest boxes made from plastic are easier to clean compared to pouches made of cloth or fleece. This makes them more suitable for breeding sugar gliders or dealing with a glider suffering from diarrhea.
Nest pouches provide a cozier spot for your pet. It is closer to the comfortable, familiar space inside their mother’s pouch. In effect, the pouches offer a necessary source of warmth, especially for young joeys. When sugar gliders are little, they cannot regulate their own body temperature. They need the warmth of the mother’s pouch.
In the end, choose whichever option you feel more comfortable with. If you choose a nest pouch or sleeping pouch, select a soft fleece or cloth pouch, and wash it at least once per week. But if you choose a nest box, consider getting one made of plastic, making it easier to wipe clean. However, avoid washing either type of nest too frequently, as it can eliminate the scent.
STEP 6 – Select an Assortment of Hanging Toys for the Cage
Sugar gliders need stimulation to avoid getting bored. If the glider becomes isolated, lonely, and bored, it’s more likely to get depressed. That is why toys help keep the glider active. The stimulation it provides is essential to the physical and mental health of your pet.
Toys come in a variety of sizes and textures. Some of the most common options include:
- Branches
- Rope
- Rings
- Bells
For the most part, gliders enjoy toys that they can climb on and leap from. Typically, you secure the toys to the inside of the cage. If choosing real wood, avoid cedar, plywood, oak, and red cherry. These woods may pose health risks for the creatures. Instead, choose pine, birch, balsam, maple, walnut, elm, or cactus.
When buying rope, only use rope made from 100% natural fibers, such as hemp or cotton. Nylon ropes may cause injury if the slider finds itself stuck. Moreover, large plastic rings provide spaces for sugar gliders to climb through. Just make sure that the rings are not too small to reduce the risk of the sugar glider getting its head stuck inside the ring.
Bells are also popular, as sugar gliders enjoy making noise. As with any of the toys that you select, the bells should not pose a choking hazard. In fact, make sure to secure the bells to other objects, such as rings or rope. As a final suggestion, consider adding an exercise wheel but avoid the wire-type wheels.
Do sugar gliders always need a cage?
A cage provides the most suitable habitat for sugar gliders. It gives the glider a safe space to sleep, eat, climb and play. Without a cage, it may occasionally relieve itself around the house or try to eat things that it shouldn’t.
How often should you clean a sugar glider cage?
Clean out the cage and bedding once per week. The bedding may need more frequent cleaning, especially if the cage houses multiple sugar gliders. Clean food dishes and water bottles daily and sterilize them every 90 days. Wash pouches, blankets, toys, and other items once per week or as needed.
When should you take sugar gliders out of their cage?
When bonding, try to carry your baby sugar glider in a bonding pouch throughout the morning. Some owners carry their sugar bears around all day. Never leave your sugar glider unattended outside the cage or pouch, as they like to explore.
What is the ideal room temperature for a sugar glider cage?
Sugar gliders prefer temperatures between 75 degrees and 80 degrees Fahrenheit. However, they can tolerate temperatures down to 65 degrees Fahrenheit. Typically, gliders are fine at normal room temperature, but some owners prefer to add a heat source to the cage.
Resources and further reading:
- Providing a Home for a Sugar Glider, Rosemary J. Booth
- Wellness Management and Environmental Enrichment of Exotic Pets, Agnes E. Rupley
Contents
- STEP 1 – Choose the right type of cage for your sugar gliders
- STEP 2 – Choose a Suitable Spot in Your House for the Cage
- STEP 3 – Gather the necessary items
- STEP 4 – Pick the right bedding for your sugar gliders
- STEP 5 – Invest in good nest pouches
- STEP 6 – Select an Assortment of Hanging Toys for the Cage
- Do sugar gliders always need a cage?
- How often should you clean a sugar glider cage?
- When should you take sugar gliders out of their cage?
- What is the ideal room temperature for a sugar glider cage?